[AWS 무료 서버구축-8/18] Maria DB 설치
Setup/aws2021. 7. 25. 15:17


Maria DB 설치
aws freeiter linux 서버에 mariadb 설치를 진행하겠습니다
설치
우선 repository 부터 아래와 같이 설정합니다.
ubuntu@goodsaem:~$ sudo apt-get install software-properties-common
ubuntu@goodsaem:~$ sudo apt-key adv --fetch-keys 'https://mariadb.org/mariadb_release_signing_key.asc'
ubuntu@goodsaem:~$ sudo add-apt-repository 'deb [arch=amd64,arm64,ppc64el] https://mirror.yongbok.net/mariadb/repo/10.5/ubuntu bionic main'
패키지를 업데이트한후 mariadb 설치를 진행합니다.
ubuntu@goodsaem:~$ sudo apt update
ubuntu@goodsaem:~$ sudo apt install mariadb-server -y
마리아 디비 버전을 확인합니다. 설치 시점의 최신 버전 10.5.9-MariaDB 으로 설치 되었습니다.
ubuntu@goodsaem:~$ mariadb -V
mariadb  Ver 15.1 Distrib 10.5.9-MariaDB, for debian-linux-gnu (x86_64) using readline 5.2
보안설정
마리아 디비 보안 관련 설정을 진행 합니다.
ubuntu@goodsaem:~$ sudo mysql_secure_installation상세 설정 내용은 아래와 같습니다.
- 8 라인 root 유저가 사용할 패스워드를 입력합니다.
- 16 라인 unix socket 인증방식 사용여부는 n 으로 지정해 주세요(root 쉘인증이 기본 사용됩니다.)
- 21-23 라인 root passwor를 변경합니다.
- 35 라인 익명 사용자를 삭제 합니다.
- 41 라인 root의 원격접속을 막습니다. root 는 항상 로컬에서만 접속 가능합니다.
- 48 라인 test 데이터 베이스를 삭제 합니다.
- 57 라인 권한에 대한 리로드를 진행합니다. y를 입력해주세요
NOTE: RUNNING ALL PARTS OF THIS SCRIPT IS RECOMMENDED FOR ALL MariaDB
      SERVERS IN PRODUCTION USE!  PLEASE READ EACH STEP CAREFULLY!

In order to log into MariaDB to secure it, we'll need the current
password for the root user. If you've just installed MariaDB, and
haven't set the root password yet, you should just press enter here.

Enter current password for root (enter for none):
OK, successfully used password, moving on...

Setting the root password or using the unix_socket ensures that nobody
can log into the MariaDB root user without the proper authorisation.

You already have your root account protected, so you can safely answer 'n'.

Switch to unix_socket authentication [Y/n] n
 ... skipping.

You already have your root account protected, so you can safely answer 'n'.

Change the root password? [Y/n] y
New password:
Re-enter new password:
Password updated successfully!
Reloading privilege tables..
 ... Success!


By default, a MariaDB installation has an anonymous user, allowing anyone
to log into MariaDB without having to have a user account created for
them.  This is intended only for testing, and to make the installation
go a bit smoother.  You should remove them before moving into a
production environment.

Remove anonymous users? [Y/n] y
 ... Success!

Normally, root should only be allowed to connect from 'localhost'.  This
ensures that someone cannot guess at the root password from the network.

Disallow root login remotely? [Y/n] y
 ... Success!

By default, MariaDB comes with a database named 'test' that anyone can
access.  This is also intended only for testing, and should be removed
before moving into a production environment.

Remove test database and access to it? [Y/n] y
 - Dropping test database...
 ... Success!
 - Removing privileges on test database...
 ... Success!

Reloading the privilege tables will ensure that all changes made so far
will take effect immediately.

Reload privilege tables now? [Y/n] y
 ... Success!

Cleaning up...

All done!  If you've completed all of the above steps, your MariaDB
installation should now be secure.

Thanks for using MariaDB!
디비연결
아래 명령어를 입력하여 mariadb 에 접속합니다. 성공적으로 접속되었습니다.
ubuntu@goodsaem:~$ sudo mariadbWelcome to the MariaDB monitor. Commands end with ; or \g.
Your MariaDB connection id is 53
Server version: 10.5.9-MariaDB-1:10.5.9+maria~bionic mariadb.org binary distribution
Copyright (c) 2000, 2018, Oracle, MariaDB Corporation Ab and others.
Type 'help;' or '\h' for help. Type '\c' to clear the current input statement.
MariaDB [(none)]>
마리아 디비 설정
마리아 db 설정을 진행하겠습니다. 아래 명령어를 입력하여 설정파일을 수정합니다.
ubuntu@goodsaem:~$ sudo vi /etc/mysql/mariadb.conf.d/50-server.cnf가장 마지막 줄에 아래 설정을 추가합니다. (119-130 라인)
#
# These groups are read by MariaDB server.
# Use it for options that only the server (but not clients) should see

# this is read by the standalone daemon and embedded servers
[server]

# this is only for the mysqld standalone daemon
[mysqld]

#
# * Basic Settings
#

user                    = mysql
pid-file                = /run/mysqld/mysqld.pid
basedir                 = /usr
datadir                 = /var/lib/mysql
tmpdir                  = /tmp
lc-messages-dir         = /usr/share/mysql
lc-messages             = en_US
skip-external-locking

# Broken reverse DNS slows down connections considerably and name resolve is
# safe to skip if there are no "host by domain name" access grants
#skip-name-resolve

# Instead of skip-networking the default is now to listen only on
# localhost which is more compatible and is not less secure.
bind-address            = 127.0.0.1

#
# * Fine Tuning
#

#key_buffer_size        = 128M
#max_allowed_packet     = 1G
#thread_stack           = 192K
#thread_cache_size      = 8
# This replaces the startup script and checks MyISAM tables if needed
# the first time they are touched
#myisam_recover_options = BACKUP
#max_connections        = 100
#table_cache            = 64

#
# * Logging and Replication
#

# Both location gets rotated by the cronjob.
# Be aware that this log type is a performance killer.
# Recommend only changing this at runtime for short testing periods if needed!
#general_log_file       = /var/log/mysql/mysql.log
#general_log            = 1

# When running under systemd, error logging goes via stdout/stderr to journald
# and when running legacy init error logging goes to syslog due to
# /etc/mysql/conf.d/mariadb.conf.d/50-mysqld_safe.cnf
# Enable this if you want to have error logging into a separate file
#log_error = /var/log/mysql/error.log
# Enable the slow query log to see queries with especially long duration
#slow_query_log_file    = /var/log/mysql/mariadb-slow.log
#long_query_time        = 10
#log_slow_verbosity     = query_plan,explain
#log-queries-not-using-indexes
#min_examined_row_limit = 1000

# The following can be used as easy to replay backup logs or for replication.
# note: if you are setting up a replication slave, see README.Debian about
#       other settings you may need to change.
#server-id              = 1
#log_bin                = /var/log/mysql/mysql-bin.log
expire_logs_days        = 10
#max_binlog_size        = 100M

#
# * SSL/TLS
#

# For documentation, please read
# https://mariadb.com/kb/en/securing-connections-for-client-and-server/
#ssl-ca = /etc/mysql/cacert.pem
#ssl-cert = /etc/mysql/server-cert.pem
#ssl-key = /etc/mysql/server-key.pem
#require-secure-transport = on

#
# * Character sets
#

# MySQL/MariaDB default is Latin1, but in Debian we rather default to the full
# utf8 4-byte character set. See also client.cnf
character-set-server  = utf8mb4
collation-server      = utf8mb4_general_ci

#
# * InnoDB
#

# InnoDB is enabled by default with a 10MB datafile in /var/lib/mysql/.
# Read the manual for more InnoDB related options. There are many!
# Most important is to give InnoDB 80 % of the system RAM for buffer use:
# https://mariadb.com/kb/en/innodb-system-variables/#innodb_buffer_pool_size
#innodb_buffer_pool_size = 8G

# this is only for embedded server
[embedded]

# This group is only read by MariaDB servers, not by MySQL.
# If you use the same .cnf file for MySQL and MariaDB,
# you can put MariaDB-only options here
[mariadb]

# This group is only read by MariaDB-10.5 servers.
# If you use the same .cnf file for MariaDB of different versions,
# use this group for options that older servers don't understand
[mariadb-10.5]

server-id=1
log_bin = binlog
expire_logs_days=10
innodb_buffer_pool_size = 384M
innodb_file_per_table=TRUE
character-set-client-handshake=OFF
skip-character-set-client-handshake
max_allowed_packet=500M
init_connect=SET collation_connection = utf8mb4_general_ci
init_connect=SET NAMES utf8mb4
character-set-server = utf8mb4
collation-server = utf8mb4_general_ci
설정된 값이 적용되도록 마리아 디비를 재시작 합니다.
ubuntu@goodsaem:~$ sudo systemctl restart mariadb'Setup > aws' 카테고리의 다른 글
| [AWS 무료 서버구축-10/18] Maria DB 유저 생성 및 권한 부여 (0) | 2021.07.25 |
|---|---|
| [AWS 무료 서버구축-9/18] Maria DB 데이터 베이스 생성 (0) | 2021.07.25 |
| [AWS 무료 서버구축-6/18] AWS free tier 서버 Linux 설정 (0) | 2021.07.25 |
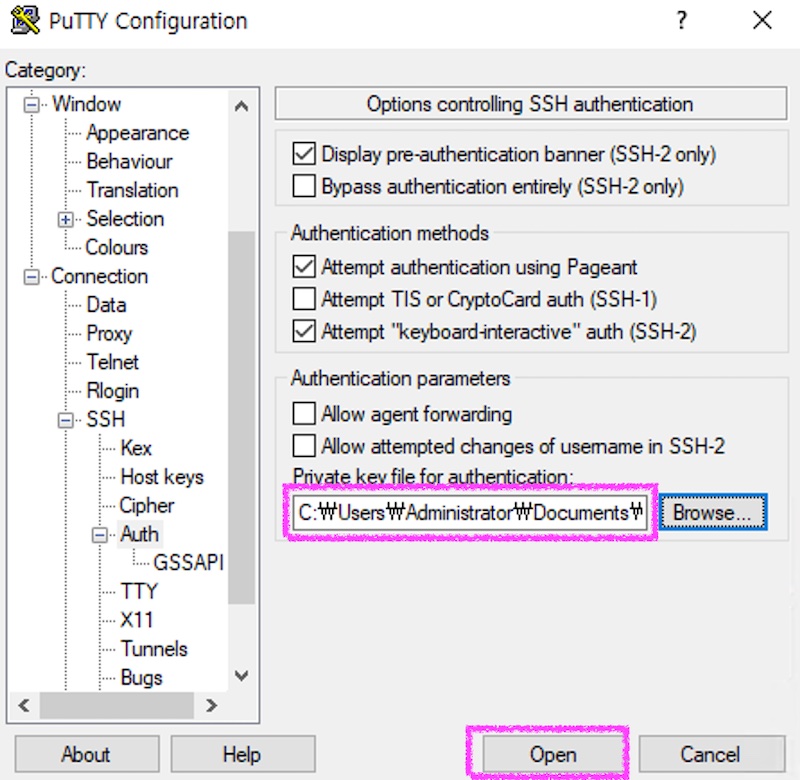
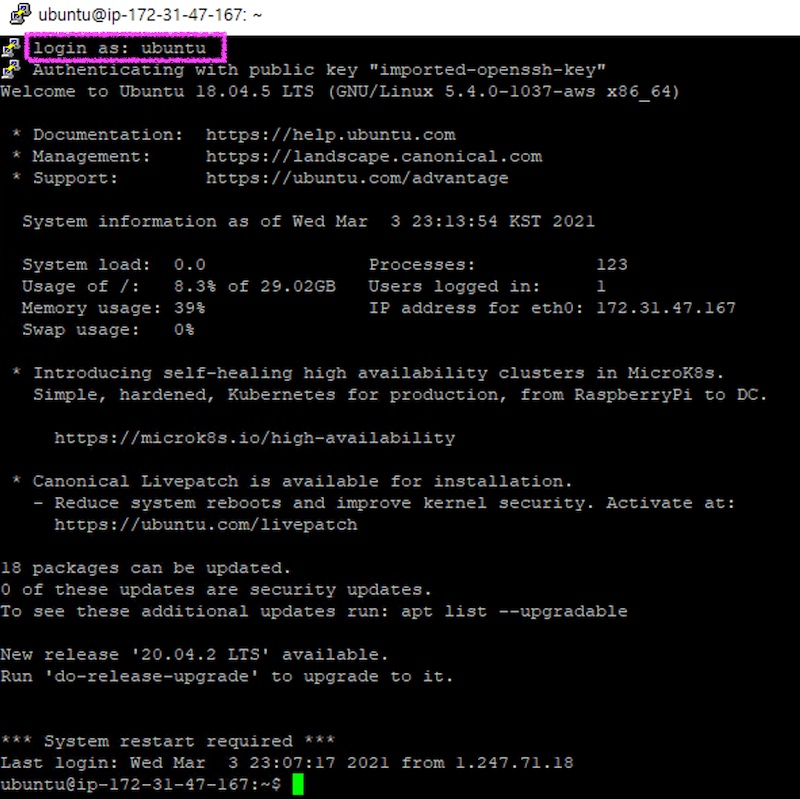
| [AWS 무료 서버구축-5/18] AWS free tier 서버 접속(mac, windows) (0) | 2021.07.25 |
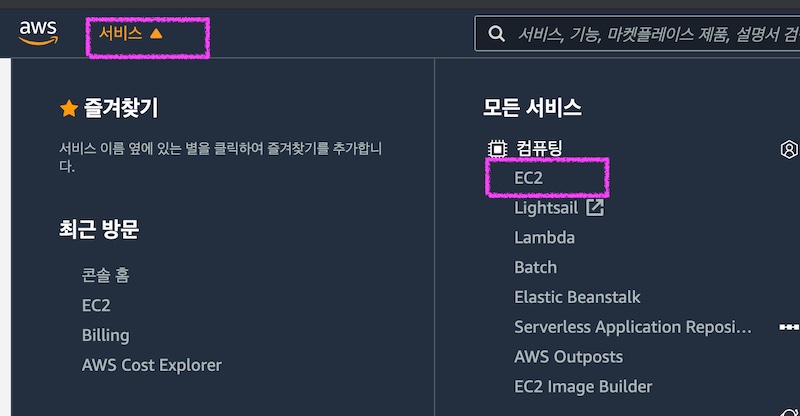
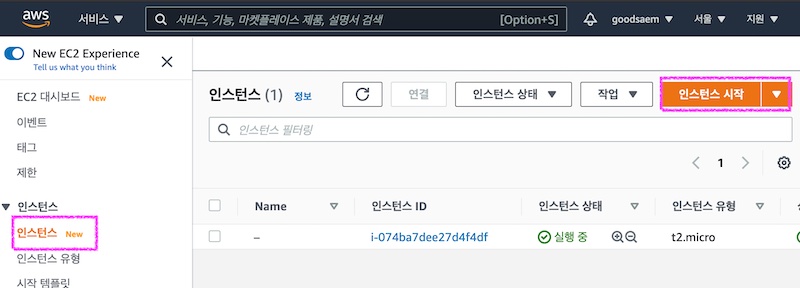
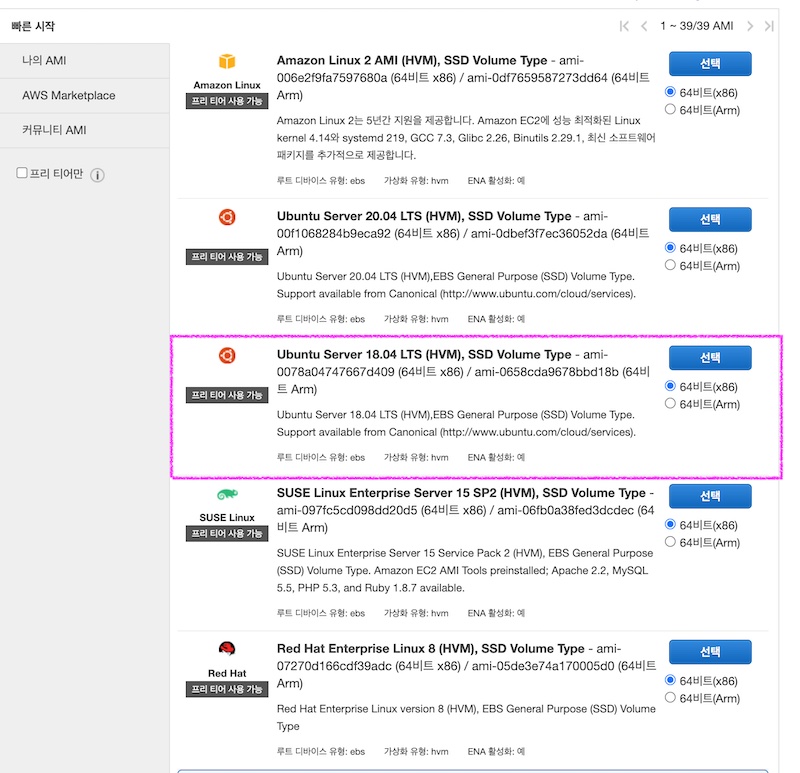
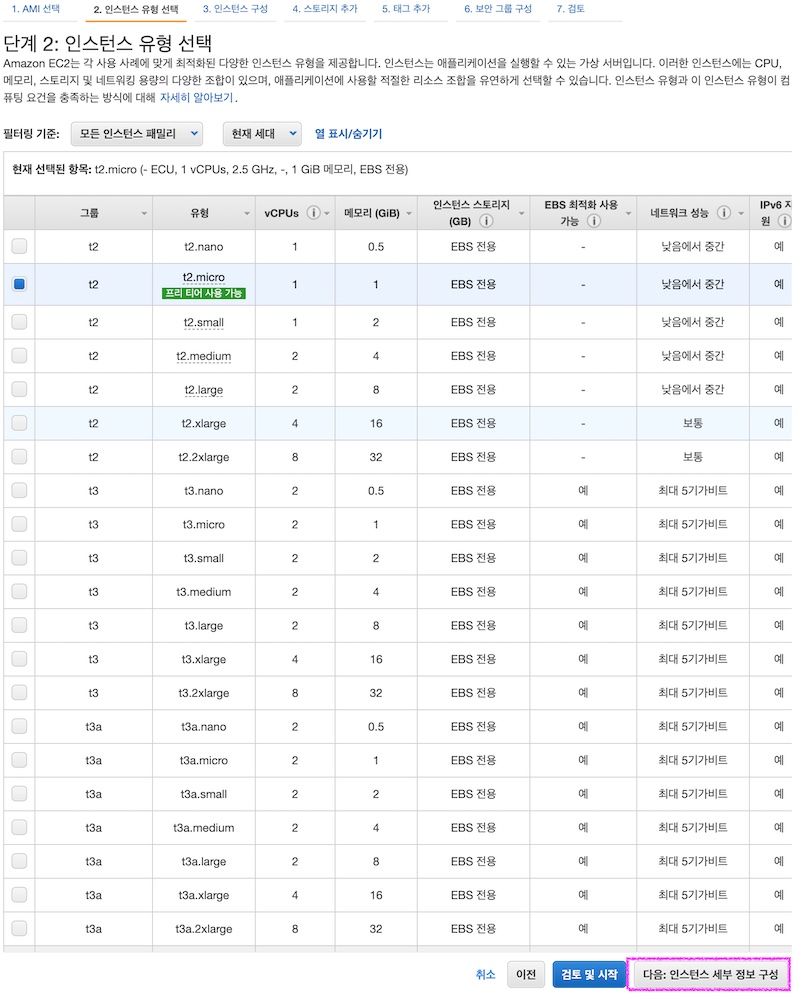
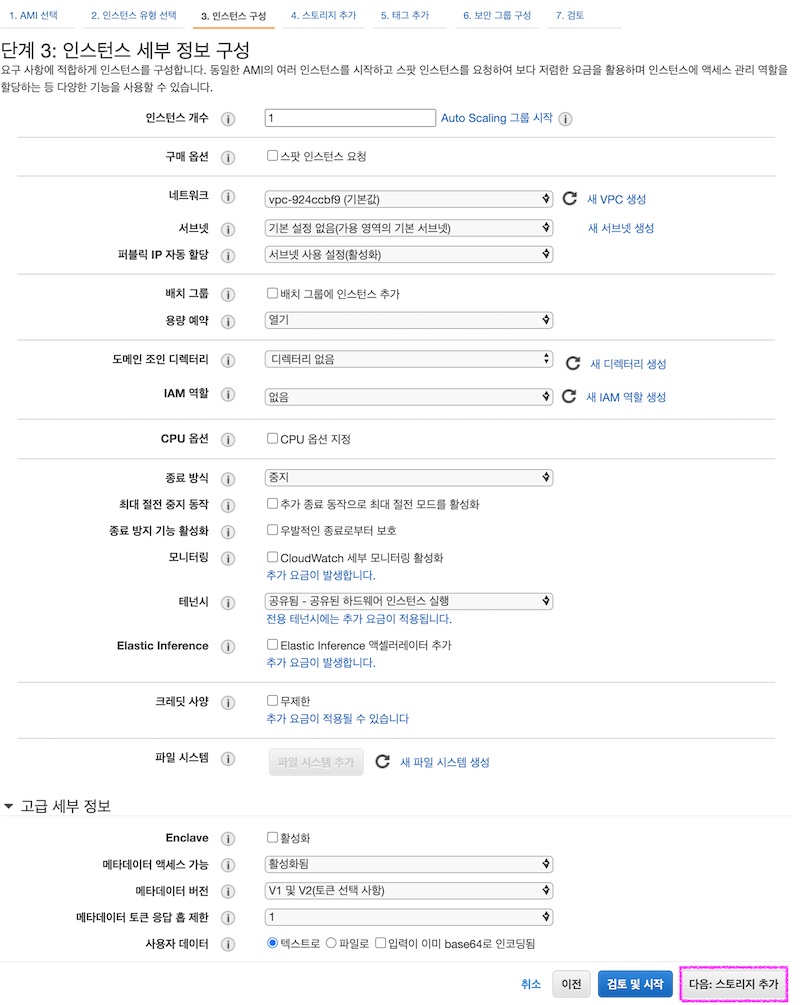
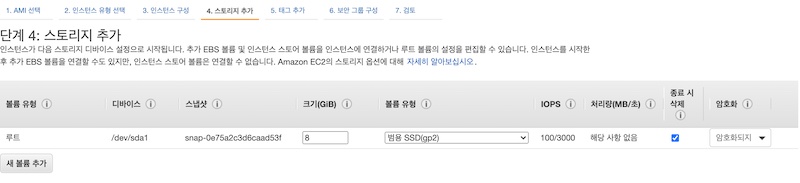
| [AWS 무료 서버구축-4/18] AWS 에 EC2 인스턴스 추가 (0) | 2021.07.25 |
댓글()